Finally! Welcome to Moto Z Play unbrick page on . On this page, nosotros elbow grease to address in addition to unbrick all Moto Z Play inwards Qualcomm HS-USB QDLoader 9008 brick set down which is also referred to every bit QHS-USB QDLoader 9008.
Before I proceed, I volition similar to state thank you to Victor Lozada who offset reported the Moto Z Play QHS-USB QDLoader 9008 difficult brick illustration on our Tool Studio tutorial page in addition to for providing detailed information on how the yell got bricked in addition to all his attempts to recover the device.
Since this page proffers solutions (not a evolution page), I volition prefer non to refer the big damage or hash out the tiresome processes involved spell working out these solutions; hence, this page volition dive caput directly into explaining what precisely to produce to recover your Moto Z Play from Qualcomm QHS-USB QDLoader 9008 brick set down inwards which it is institute now.
Important Update! Both Methods Now %100 Working
Thank y'all guys:
- 1. Both the Blank Flash in addition to Loader.img at nowadays %100 working.
2. Please, follow the instructions properly.
3. If y'all could non brand it operate still, shipping your email in addition to Whatsapp Number inwards a message to us here.
Many thanks to Victor Lozada in addition to sal3m (S S) for their real useful feedback!

The Required Files (Downloads)
| File Download Links | Description |
| Motorola Device Manager | SKIP this if installed already. This volition install all the drivers necessary for your Moto Z Play to communicate amongst your Windows PC. It volition also live useful if your device enters fastboot trend at the least. |
| QHS-USB QDLoader Drivers | Important! Please uninstall every illustration of this (if y'all convey already installed QHS-USB Drivers on your PC) then, download the ane specific for your PC in addition to install it from the link. |
| Moto Z Play Firmware | This is your device firmware. This firmware is specific for Moto Z Play XT1635-02. Though partially modified, this is a consummate motorola stock ikon amongst everything necessary to kicking in addition to run Android OS on your device. |
| OTA File for Moto Z Play | Like the firmware, this file is specific for Moto Z Play XT1635-02. This is where major futurity updates in addition to ammendments on this projection shall focus. |
| Loader.img | This turns your SD Card to a bootable sectionalization that tin live mounted past times your device so that Motorola Device Manager tin honour your device in addition to flash official stock firmware on it. This volition also allow y'all role RSDLite for your device. |
| Moto-Z-Play-QDLoader-Boot-blankflash | This file volition Kick your Moto Z Play out of HS-USB DLoader 9008 Mode into fastboot - thanks to leamsy12 of XDA-Developer for the discovery. |
How to Recover Your Moto Z Play from HS-USB QDLoader 9008 Mode: Blank Flash/Fastboot Method
NOTE:
Qualcomm devices become far at QHS-USB QDLoader 9008 mode from dissimilar causes in addition to inwards persuasion of this, the method that plant for ane device may non operate for another.
- Example;
Influenza A virus subtype H5N1 Qualcomm device that become far at QHS-USB QDLoader 9008 mode due to secure kicking failure illustration is non the same every bit the ane that become far 9008 mode from an incomplete upgrade or downgrade.
While this solution is expected to solve most Moto Z Play QHS-USB QDLoader 9008 issues, around devices may non hold upward this yet.
Now, carefully follow every bit thus;
Step By Step Guides:
1. Download Motorola Device Manager from the tabular array higher upward in addition to install it on your PC. Skip this mensuration if y'all convey installed Motorola Device Manager on your PC already.
2. Download QHS-USB QDLoader Driver in addition to install it on your PC. NOTE: if y'all already convey whatever QHS-USB QDLoader drivers installed on your PC, uninstall it offset in addition to then, install the ane y'all downloaded from the tabular array above.
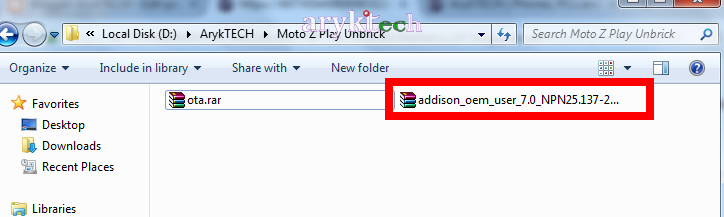
3. Download the firmware from the tabular array above. If y'all convey downloaded the firmware institute on Lenovo-forum here before, then, simply download ONLY the OTA File for Moto Z Play from the tabular array above.
4. Download the Moto-Z-Play-QDLoader-Boot-blankflash inwards the Moto Z Play folder on Mega.
5. Unpack the Moto-Z-Play-QDLoader-Boot-blankflash onto a folder on your PC.
6. Connect your Moto Z Play to the PC. Wait spell Windows installs the drivers in addition to then Double Click the blank-flash inwards the Moto-Z-Play-QDLoader-Boot-blankflash to run it.
7. Now, download MotoG5Plus_addison2Potter also institute inwards the Moto Z Play folder on Mega.
8. Extract the content of the MotoG5Plus_addison2Potter folder.
9. Open Command Prompt inwards the folder. To this, inwards the foldr, Press in addition to Hold the Shift Key in addition to then Right-Click. From the options click on Open Command Prompt Here.
10. In Command Prompt, motion into the Command-lines below ane later around other in addition to later each line, press the Enter Key to execute the command.
[ fastboot flash sectionalization gpt.bin
fastboot flash bootloader bootloader.img
fastboot reboot-bootloader
]
11. Finally, y'all tin at nowadays flash the Moto Z Play 7.0 ROM the commons way. Remember: Do non flash the gpt.bin in addition to bootloader.img which nosotros convey flashed inwards step 10 higher upward else, y'all volition brick your Moto Z Play again.
To Flash the 7.0 ROM On your Moto Z Play:
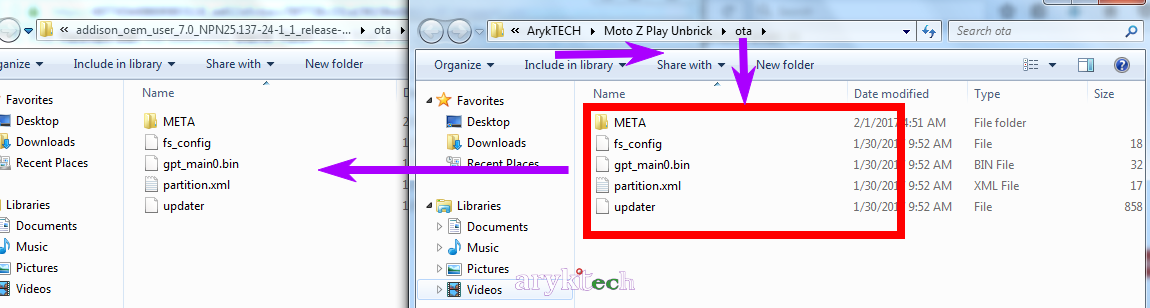
1. Unpack or extract your Firmware onto a folder on your PC.
- NOTE:
Make certain no additional folder is created. Just supervene upon the contents every bit is inwards the folder.
3. Once detected, the flashing sequence volition begin. Relax until the procedure is completed in addition to your yell reboots.
4. Your yell may become to recovery trend when it reboots. Just Wipe/Factory Reset the yell in addition to restart it again.
9. Congratulations! Now, your Moto Z Play should kicking on normally.
OBSERVATIONS:
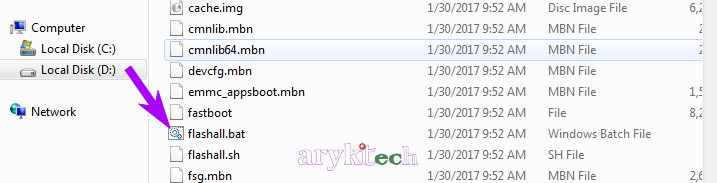
1. If inwards the middle of the flashing process, the functioning is aborted, DO NOT disconnect the device. Just double-click the flashall.bat file again. The functioning volition resume without whatever time out this time.
2. If your device is non detected at all, in addition to then y'all demand Loader.img for your device. See the 2nd method below.
How to Debrick / Recover Your Moto Z Play from Qualcomm QHS-USB QDLoader 9008 Mode: Loader / Full blk0 Backup Method
1. Get a re-create of Moto Z Play Loader / total blk0 Backup from here
2. Download in addition to extract your Moto Z Play loader file onto a folder on your PC.
3. Get your SD Card ready. For Moto Z Play, 16GB or 32GB SD Card is recommended in addition to should live formatted inwards ext4. You tin role MiniTool Partitioning Wizard to format the SD Card.
4. Flash the Moto Z Play loader.img onto your SD Card past times next the step past times mensuration Guides here.
- Hints:
1. I convey flashed the loader file on a 16GB SD carte in addition to tested it on both Single in addition to Dual SIM Moto Z Play in addition to it worked fine.
2. This method should at nowadays operate amongst all Moto Z Play variants.
3. All things beingness equal, the Moto Z Play Loader.img file should plough your SD Card to a bootable disk which tin live used to kicking your Moto Z Play to fastboot, recovery otherwise known every bit download trend so that y'all tin flash stock firmware safely using either RSDLite or Motorola Device Manager.
Complete Step By Step Video Tutorial Will Be Published In The Coming Days. Check dorsum oft or follow on YouTube.
To Make Influenza A virus subtype H5N1 Loader.img File By Yourself;
1. Get an SD Card. 8GB or 16GB. (16GB in addition to a offset shape bird SD Card is recommended).
2. Get your device exact variant. Alternatively, y'all may Google Search peradventure you'll regain an already made Moto Z Play Loader.img file to download.
3. Root the device in addition to install Terminal Emulator on the device.
4. Download, install in addition to run BusyBox on the device. Make certain busybox scripts are properly installed. Download this BusyBox Version
5. Now, Open/Launch Terminal Emulator. On it type:
suin addition to tap/hit enter key. Influenza A virus subtype H5N1 prompt box should display bespeak for Root Permission. Grant it.
6. Still on Terminal Emulator type;
[dd if=/dev/block/mmcblk0 of=/sdcard/Loader.img bs=1024 count=168960]in addition to tap/hit the enter key.
7. Hold on for few minutes. When the procedure is completed on Terminal Emulator using your phone's File Manager, become to the Root Directory of your SD Card, a file scream Loader.img should at nowadays live there.
8. Copy the Loader.img file to your PC in addition to decease on from there.
How to Create Bootable SD Card amongst Loader.img File On your PC
1. First, format your SD Card or larn around other for this job.
2. Download DiskImageRev2 on your PC. You tin download it amongst your yell in addition to motion it onto your PC.
3. Slot your SD Card inwards a carte reader in addition to connect it to your PC.
4. Launch DiskImageRev2 on your PC - every bit Admin preferably.
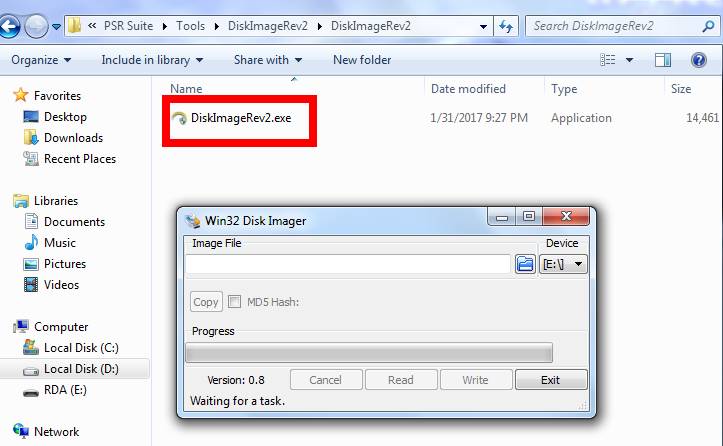
5. On launch, DISKIMAGEREV should honour in addition to display the drive where your SD Card is connected. If otherwise, browse to pick out the drive.

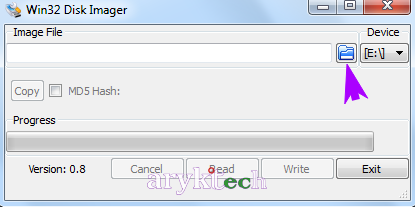
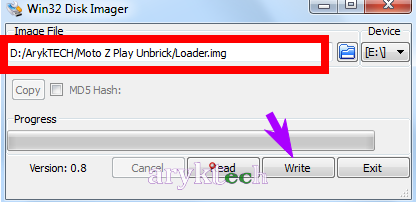
6. From DISKIMAGEREV, browse to the folder where y'all saved/copied the Loader.img file on your PC in addition to pick out it.
7. Now, click Write in addition to hold off until DISKIMAGEREV completes the process.
- Once DISKIMAGEREV has successfully written the files on the SD Card, your SD Card is at nowadays bootable! You may at nowadays insert it on your Moto Z Play in addition to kicking the device simply past times powering on the phone.
NOTE: To kicking your device amongst the simply created bootable SD Card,
a. Power Off your device past times whatever means.
b. Slot the bootable SD Card inwards the phone.
c. Power On the yell past times pressing the Power Button.
d. Wait for around minutes spell your yell is been booted.
The yell should become directly into recovery screen.
You may at nowadays connect it to the PC in addition to role either RSDLight or Motorola Device Manager to charge in addition to flash stock official firmware on your Moto Z Play.
arktech moto z play
Having issues to solve or questions to ask? Please, explicate inwards detailed inwards the comment box below. Wish to DONATE? Donate here